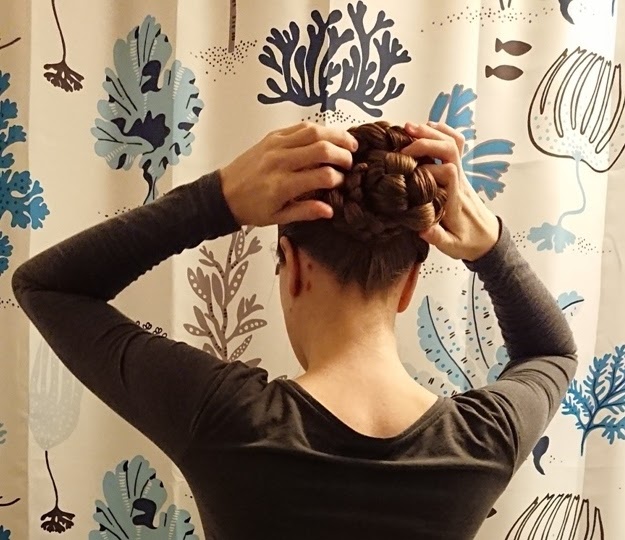
Saturday, 23 December 2017
16 years!
Crazy that it has been so long, isn't it?
Picture didn't turn out so well. I came home late and it was completely dark by the time my hair had dried.
I put it in a braid while almost dry for just a few minutes to eat dinner, and yet it left wave-tracks. Arrrgh!
Wednesday, 20 December 2017
Ellingwoman/Nautilus hybrid bun
My comment about the Ellingwoman being more stable than the Nautilus bun the other day gave me an idea.
So, here goes...
Hair is in a French braid.
Create a loop like for a regular Nautilus bun.
Poke fingers in under the French braid part.
Pull braid in through, under the loop and under the French braid-part.
Adjust loop size and pull a little more of the braid through.
Keep wrapping around the base of the braid and pulling through the French braid in the same spot.
Pull outer loop over the inner parts.
Put tool in between outer loop and inner parts.
Push tool out again between outer loop and inner parts.
Done!
This was super comfortable and stable!
Also, having the inner braids "hidden" under the French part allows the braid to show better. The bun looks "cleaner".
Compare this to a regular Nautilus bun:
Here's my simplified paint-explanation to show what happened:
On a regular Nautilus bun, you have the outer loop (Orange) going around the inner loop (Red) when you finish the updo. But the inner loop (Red) is only actually secured by the outer loop (Orange) going around it and holding it in place. It is very secure as an updo, but it needs a tool to hold it up through too much activity. I usually pin the tool in between the outer and inner loops and out again on the other side.
By pulling the inner loops (Red) in through the French braid, like the Ellingwoman bun, the inner loops are held up on their own. The outer loops (Orange) are the only part of the updo that needs a tool to stay in place. By pinning a tool in between the outer and inner loops and out again on the other side, you create an extremely secure updo, because you anchor the outer loops to the already secure inner loops.
Sunday, 17 December 2017
Simplified version of the Ellingwoman bun
The Elling woman was found in Denmark in 1938. She is one of the many well preserved bog bodies found in northern Europe. She died around 280 BCE and was around 25 years old.
What makes her famous in the longhair circuit is her long hair (90 cm), which was braided and knotted up in an elaborate bun.
The braid started in a regular three stranded braid using the crown hair. Then adding in the rest of the hair at neck-level into a six stranded braid, where the strands were braided in two and two. This must have required some sort of twisting to keep the strands separated.
It probably had some sort of symbolic value, maybe magic numbers or something?
The braid was tied off using the hair itself. This is perhaps the thing that is the hardest to recreate, since this is incredibly hard to replicate on modern, sleek and clean hair. I think some sort of fat or oil must have been used to keep it in place?
The braid was then wrapped up under the initial braid and a knot/bun was formed.
The knot has a really good stability and is often praised for being comfortable.
Compared to some of the other historical hairstyles, this is also fairly easy to recreate.
However, there is a few "cheats" I like to do with it...
Start with a normal French or Dutch braid.
Optional: Skip a "step" when taking in hair, so you have a "gap" to easier wrap the braid through.
Mine is here in the right side at top of ear-level.
Poke fingers through the braid to find a place to pull the braid through.
Pull braid through the gap.
Depending on the length of your braid, you can stop here.
You can also wrap until you have the length of braid left that you want.
Or keep wrapping up into a complete bun with no loose braid.
Tuck ends in.
The bun is incredibly self stabilizing.
This is perhaps the only rival to the Nautilus bun when it comes to stability.
It doesn't even need a tool, but I like to add one anyways.
I think a bone hair stick is suitable!
This one is from WoodArtJewelry.
Subscribe to:
Comments (Atom)


